
 In my previous post ‘10 Reasons Why Grails Web Application Framework Rocks’, we figured out specific reasons that helped Grails framework gain wide acceptance among the software developer communities. Taking this topic to the next level, we will figure out the process of setting up a Grails framework in the Windows environment. I have segregated the blog in six simple steps, which would not only help developers to comprehend information easily, but it will also act as a handy resource for Grails framework installation.
Step 1 – Oracle Java Development Kit (JDK) Installation
A Grails framework runs on top of a Java platform, hence the first step is to install a Java Development Kit (JDK) on your local machine. In the given example, I have installed jdk1.7.0_21 on my local machine. In order to download Oracle JDK 7 installer, visit Oracle’s official website.

Step 2 – Grails Application Framework Installation
In like manner, download the latest version of the Grails framework by visiting their website. After downloading the software, extract the application on your local machine.
As can be seen, I have downloaded and installed grails-2.3.8 on my local machine.

Step 3 – Setting-up Environment Variables
To set up environment variables add JAVA_HOME (the directory where the JDK is installed) and GRAILS_HOME (the directory where Grails framework was extracted) to their respective executable programs. This is an important step and must be kept in mind.
 Step 4 – Groovy and Grails Tool Suite Installation
Download Groovy and Grails tool suite, which is built on top of the Eclipse platform and is one of the most popular free integrated development environment (IDE) for Grails application development. To download the tool, visit the website Spring.io and extract the tool to your local machine.

In this instance, I have downloaded ggts-3.5.1.RELEASE and installed it on my local machine. Now, we are all set to run this tool.
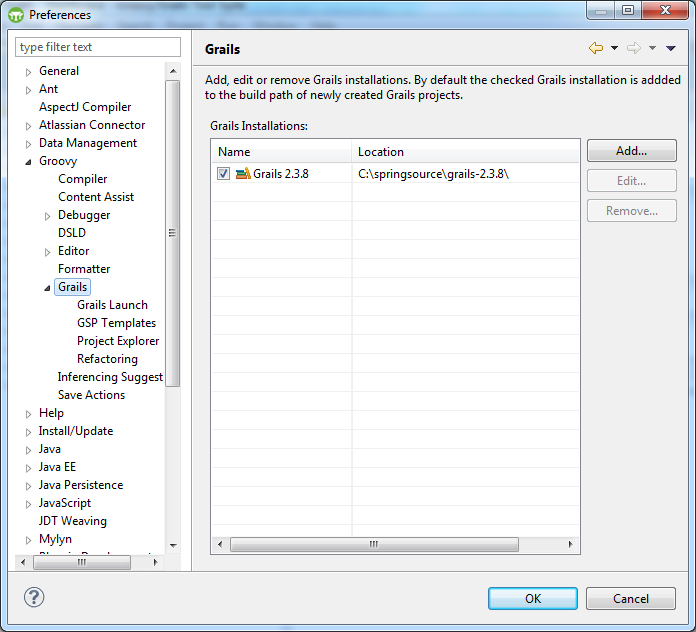
Step 5 – Groovy and Grails Tool Suite Configuration
While configuring the Groovy and Grails tool ensure that Java Runtime of the IDE points to a JDK instead of a JRE. The below steps will help you identify this.
Select Preferences:
Step 1: Edit Installed JRE
Step 2: Check if it is pointing to a JRE installation
Step 3: If yes, change it to the JDK installation directory
Step 6 – Create and Execute a Sample Project
In order to verify if everything is working fine, let’s create a sample project and execute it. Correspondingly, follow the steps mentioned below:
- Click on the file menu and create a new Grails project: Assign it a name (e.g. sample).
- Click on Finish: The project is created with default directories and files.
- Type ‘run-app’ and hit the enter key.
- The following page is displayed on the screen.

Now that all the above steps have been executed, we should be able to view the default skeleton program of the Grails framework.
Conclusion
As shown above, setting up a Grails framework in the Windows environment is a relatively easy task. The above steps would certainly assist developers to quickly install the framework on their Windows compatible systems. Grails framework is a preferred choice for developers, especially those who are familiar with Java programming. Grails is a very useful framework to create highly scalable e-commerce websites, video portals etc. It’s fast, quick and easy.
Author
 |
Anju Kasa was a Senior Technical Associate at Evoke Technologies. She is technically sound in web application design and development with hands on experience on ASP.NET, C#, Hibernate, SQL Server, Core Java, and Grails/Groovy. |


