
Bonita – the world’s fastest-growing open-source BPM provider offers an excellent UI design platform known as ‘Bonita UI Designer’. By using the exceptional features of Bonita UI designer, BPM developers can offer an ultramodern and improved experience to their business users and clients.
The Bonita UI designer offers a number of default widgets such as text, link, image, container etc., which are quite helpful in creating rich UI designs. Additionally, Bonita provides options to create custom widgets to meet the dynamic needs of business users. Once a widget is created, it can be reused multiple times. In this blog, we will explore the process of creating a custom data grid widget in Bonita UI Designer.
Custom Data Grid Widget
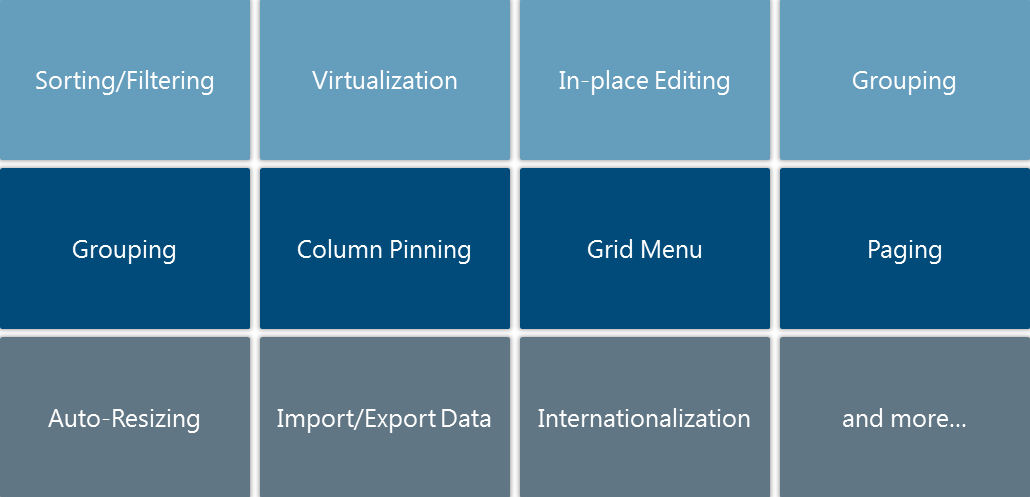
The Angular UI Grid is a powerful tool, which is primarily used to display information in the form of rows and columns. Apart from the table structure, the Angular UI Grid also provides features such as filter, sort, export, pagination etc. There are several other advanced features including advanced virtualization, internationalization etc., to gain further insights on Angular UI Grid, visit the UI-Grid website.
To make it easy for readers to understand the process of creating a custom data grid widget, we have taken an example of employee data. We will begin by understanding the process of creating a table using Angular UI Grid and displaying employee information such as employee name, employee id and employee age. Additionally, each row will contain a checkbox, expand symbol and DML operations (e.g. edit, save, delete).
A checkbox is provided to help users select a row. Similarly, the expand symbol displays additional information about employees (employee’s address, employee’s department details etc.). The edit, delete and cancel functionalities enable users to delete or edit rows.
Angular Data Grid Widget Initialization Steps
To initiate a data grid widget follow the steps outlined below:
Step 1 – Include ‘uiGrid’ in your script and CSS.
[java]<link rel="styleSheet" href="release/ui-grid.css">
<script src="https://0fabdd1a.rocketcdn.me/release/ui-grid..js"></script>[/java]
Step 2 – Add ‘ui.grid’ module as a dependency in the controller.
Step 3 – Use the ‘ui-grid’ directive and specify a JSON object with a data property referencing ‘gridOptions’ property.
[java]
<div ui-grid="gridOptions">[/java]
Step 4 – Sorting feature can be enabled by setting the property ‘enableSorting: true’ and can be disabled for particular columns by setting property ‘enableSorting: false’ based on the business requirement.
[java]{
name: 'Actions', field: 'edit', enableFiltering: false, enableSorting: false,
Field : 'actions',
}[/java]
Step 5 – The custom widget has one property which will take the input JSON array data (List of Employees). Import this data using custom widget editor properties (EmployeeList) and initialize the data in a data grid.

The above screen of the Bonita UI designer is where a custom widget can be created. In order to accept dynamic data from users, we need to create properties for this widget. These properties will be initialized in the Bonita form (properties is a functionality that is used to communicate with a widget).

By adding this custom widget in Bonita form, BPM developer can display all properties of the custom widget such as ‘List of Employee’ etc. Further, users can initialize data for these properties.
Edit Functionality
- The edit functionality will consider selected row object as input parameter. The ‘rowindex’ can be located using the input parameter and setting the ‘editRow’ flag to true for selected row will make the UI Grid row editable.
- Angular UI Grid, by design supports inline edit functionality, which can be activated by double-clicking on a particular cell. In the given example, the process of editing all columns in a row using ‘button click’ and saving these details using ‘Save Button click’ has been showcased.
- The ‘cellTempalate’ is used to make the cell editable and the flag option is used to make a row editable. When a user clicks on the Edit button, the ‘EditRow’ flag is set as true. In the ‘UIGrid’, developers can check if the flag has been set to true or false. Based on the value assigned to a flag the row is set as editable or read-only.
- Update cellTemplate in ‘Actions’ column to Edit, Update, Cancel button. The editRow flag can be reused to hide and display the edit and update buttons. The edit, saveRow, CancelEdit functions can be called from the Edit, Update and Cancel buttons respectively.
cancelEdit Functionality
The cancelEdit function considers the selected row object as an input parameter; the row index can be located using an input parameter. Setting edit Row flag for the selected row to false will make the UIGrid row as read-only.
saveRow Functionality
The saveRow function accepts the selected row object as input parameter. The row index can be located using the input parameter. Setting the ‘edit Row flat’ for the selected row to false will make the UI Grid row as read-only. Further, this functionality reads the values from an edited row and updates the record in the database by using service or factory.
deleteRow Functionality
The deleteRow functionality takes the selected row object as an input parameter; the requested employee id can be obtained from row input object. Each object of a JSON array needs to be iterated and employee id of each object needs to be compared with requested employee id. Additionally, each object of a JSON array needs to be added to a new variable except the requested employee id and the new variable should be assigned to a grid.
Clear all Filters – Used for clearing filter text boxes in the data grid, will clear all filter boxes.
Export all data as Excel – Allows developers to export total grid data to Microsoft Excel
Export visible data as Excel – Helps developers to export only visible grid data to Microsoft Excel
Export all data as PDF – Option allows developers to export grid data to a PDF format.
Export visible data as PDF – Helps developers to export visible data to a PDF format.
Columns – The Columns option is used to show/hide columns in a grid.
Data Grid Images
Here are a few screenshots showcasing a data grid:


Code Snippet
[java]
<div ui-grid="gridOptions" ui-grid-selection  ui-grid-pinning ui-grid-expandable ui-grid-pagination ui-grid-edit  ui-grid-row-edit   ui-grid-move-columns  ui-grid-exporter  style="width:768px;height: 265px" ></div>
<div style="width:700px">
<uib-alert ng-repeat="alert in alerts"
type="{{alert.type}}"
dismiss-on-timeout="5000"
close="alerts.splice($index, 1);">
<div style=" width: 768px; font-size: 21px; background-color: lightgreen;"> <b> {{alert.msg}} </b> </div>
</uib-alert>
</div>
<script type="text/ng-template" id="rowExpandTemplate.html">
<div class="row" style="padding:11px 34px 80px 10px;background-color: lightgrey;">
<div class="col-sm-6">
<div class="col-sm-6">Address : </div>
<div class="col-sm-6">{{ row.entity.address}}</div>
</div>
<div class="col-sm-3">salary : {{ row.entity.salary }}</div>
<div class="col-sm-3">Department : {{ row.entity.department}} </div>
</div>
</div>
</script>[/java]
Assets
Here is a list of assets that have been used to create a custom data grid widget.
http://ajax.googleapis.com/ajax/libs/angularjs/1.6.4/angular.min.js
http://ui-grid.info/release/ui-grid.css
http://netdna.bootstrapcdn.com/font-awesome/4.0.3/css/font-awesome.css
https://cdnjs.cloudflare.com/ajax/libs/angular-ui-bootstrap/1.1.2/ui-bootstrap.js
http://ui-grid.info/release/ui-grid.js
http://ajax.googleapis.com/ajax/libs/angularjs/1.5.0/angular-touch.js
http://ajax.googleapis.com/ajax/libs/angularjs/1.5.0/angular-animate.js
http://ui-grid.info/docs/grunt-scripts/csv.js
http://ui-grid.info/docs/grunt-scripts/pdfmake.js
http://ui-grid.info/docs/grunt-scripts/vfs_fonts.js
https://cdnjs.cloudflare.com/ajax/libs/xlsx/0.9.12/xlsx.full.min.js
https://fastcdn.org/FileSaver.js/1.1.20151003/FileSaver.min.js
Required Angular Modules
Here is a list of the required Angular modules.
- ui.grid.edit
- ui.grid.cellNav
- ui.grid.pagination
- ui.grid.expandable
- ui.grid.saveState
- ui.grid.selection
- ui.grid.rowEdit
- ui.grid.exporter
- ui.grid
- ui.grid.moveColumns
- ui.grid.pinning
Controller
[java]function ($scope,$templateCache,$interval,$q,$rootScope, uiGridRowEditService) {
//Angular function for defining all grid options
//Angular function for displaying all records into a grid
//Angular function for adding new record into a grid
//Angular function for deleting a record by id from grid
//Angular function for editing a record by id from grid
}[/java]
Code snippet for defining all grid options
[java]$scope.gridOptions = {
enableSorting: true,
enableFiltering: true,
enableRowSelection: true,
multiSelect :true,
enableSelectAll :true,
paginationPageSizes: [25, 50, 75],
paginationPageSize: 5,
expandableRowTemplate: $templateCache.get('rowExpandTemplate.html'),
expandableRowHeight: 150,
enableColumnMenus: false,
isEditModeOn: false,
columnDefs: [
{ field: 'name', enableCellEdit: true ,cellTemplate: '<div  ng-if="!row.entity.editrow">{{COL_FIELD}}</div><div ng-if="row.entity.editrow"><input type="text" style="height:30px" ng-model="MODEL_COL_FIELD"</div>' },
{ field: 'age', enableCellEdit: true ,cellTemplate: '<div  ng-if="!row.entity.editrow">{{COL_FIELD}}</div><div ng-if="row.entity.editrow"><input type="text" style="height:30px" ng-model="MODEL_COL_FIELD"</div>' },
{ field: 'empId',  enableCellEdit: true, enableSorting: false ,cellTemplate: '<div  ng-if="!row.entity.editrow">{{COL_FIELD}}</div><div ng-if="row.entity.editrow"><input type="text" style="height:30px" ng-model="MODEL_COL_FIELD"</div>'},
{
name: 'Actions', field: 'edit', enableFiltering: false, enableSorting: false,
cellTemplate: '<div><button ng-show="!row.entity.editrow" class="btn primary" ng-click="grid.appScope.edit(row.entity)"><i class="fa fa-edit"></i></button>' +  //Edit Button
'<button ng-show="row.entity.editrow" class="btn primary" ng-click="grid.appScope.saveRow(row.entity)"><i class="fa fa-floppy-o"></i></button>' +//Save Button
'<button ng-show="row.entity.editrow" class="btn primary" ng-click="grid.appScope.cancelEdit(row.entity)"><i class="fa fa-times"></i></button>' + //Cancel Button
'</div>', width: 100
},
{
name : 'delete',enableFiltering: false, enableSorting: false,
cellTemplate: '<div> <button  class="btn primary" ng-click="grid.appScope.deleteRow(row.entity)"><i class="fa fa-times"></i></button> </div>'
}
]
}
};[/java]
Code snippet for displaying all records in the UI grid
[java]$scope.gridApi = gridApi;
gridApi.expandable.on.rowExpandedStateChanged($scope, function (row) {
$scope.SelectedRow =[ { "name": row.entity.name,
"age" : row.entity.age,
"location" : row.entity.location
}];
$scope.properties.SelectedRow = JSON.stringify($scope.SelectedRow);
});[/java]
Code snippet to add new records to UI grid
[java]$scope.saveRow = function (row) {
//get the index of selected row
$scope.alerts = [];
var index = $scope.gridOptions.data.indexOf(row);
//Remove the edit mode when user click on Save button
$scope.gridOptions.data[index].editrow = false;
$scope.alerts.push({
msg: 'Data saved successfully',
type: 'success'
});
};[/java]
Code snippet to delete a record by id from UI grid
[java]$scope.deleteRow = function(row){
var empId = row.empId;
$scope.alerts = [];
console.log('delete function '+empId);
var i=0;
var index = $scope.gridOptions.data.indexOf(row);
$scope.gridOptions.data[index].editrow = false;
var newGridData = [];
angular.forEach($scope.gridOptions.data, function (value, key) {
console.log("i = "+i);
console.log("key "+key+" value "+value + "value [key] "+value[key]);
var isRecordFound=false;
angular.forEach(value, function (value, key) {
console.log("inner loop value "+value+" key "+key);
if(angular.equals("empId", key)){
if(angular.equals(empId, value)){
isRecordFound=true;
}
}
});
if(!isRecordFound)
newGridData.push($scope.gridOptions.data[key]);
i=i+1;
});
$scope.gridOptions.data = newGridData;
$scope.alerts.push({
msg: 'One Row deleted successfully...',
type: 'info'
});
console.log("new grid data "+newGridData);
};
Code snippet for edit record by id from grid
$scope.edit = function (row) {
$scope.alerts = [];
//Get the index of selected row from row object
dummyData= {};
dummyData = angular.copy($scope.gridOptions.data);
console.log('Edit original data '+JSON.stringify(dummyData));
var index = $scope.gridOptions.data.indexOf(row);
//Use that to set the editrow attrbute value for seleted rows
$scope.gridOptions.data[index].editrow = !$scope.gridOptions.data[index].editrow;
};[/java]
Evoke’s BPM Consulting Services
Evoke offers best BPM software solutions, which enables enterprises to effectively manage their business processes. Our Bonita consulting services are designed to streamline business processes, workflows and improve overall business efficiency. We have been assisting global enterprises by creating workflows around their business processes and improving overall productivity and lowering associated costs.
Evoke recommends the best BPM solutions to its clients to overcome their business challenges. We have been highly successful in suggesting improvements in their existing workflows by being innovative and applying creative BPM solutions to emerging business challenges.
To know more about our BPM Consulting services and our approach towards BPM, please contact our sales team at +1 (937) 660-4923.
Author
 |
Vijay Kumar Nalagonda is a Senior Technical Associate at Evoke Technologies. He is technically adept on various technologies including Java, Spring MVC, Spring AOP, Hibernate, REST Web Services, and AngularJS. Vijay likes to read about emerging technologies and is keen to explore Hadoop and NoSQL databases. |


1 Comment
Hi,
Thanks for the article. I am getting an error “Expected ‘for’ and instead saw ‘ , ‘ ” at row 13 of Code snippet for defining all grid options. Any reason for this error.